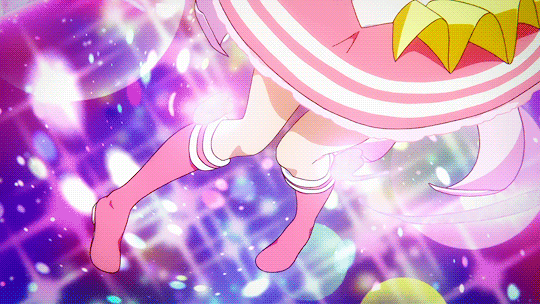
You Will Never Be Clean Again Gif
000. Making grainless gifs

Grain is nothing to lose sleep over. However you might have been agonising over that one little blotch or pixel that's out of line in the gif you're trying to upload. This tutorial will cover the best ways to deal with grain in order to achieve higher quality gifs.
This tutorial is written with a basic knowledge of gifmaking and Photoshop in mind. If you're not at that stage yet, I highly recommend my other tutorials. A great adittion to this specific guide is "Save for web explained" tutorial".
001. Where does grain come from?.
The main source of grain is how the GIF file format limits the amount of colours it can contain to 256. The average tumblr GIF is about 540x300 pixels. That's 162,000 pixels that can be filled in with a unique colour. Not to mention, most gifs will have at least 30 frames, meaning 30 times an image that can contain 162,000 unique colours. All those colours, have to somehow fit within that 256 colour limit.
001.B So, what else causes grain?
Text coming
Colourful gifs
Monotone Gifs

Black and White

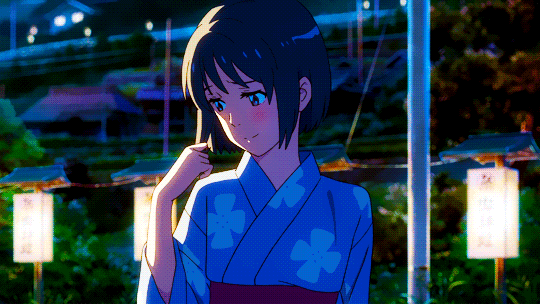
Cuts in the scene


These are two pretty different cuts with different colours. Separating them would make the scene appear cleaner. This is because rather than spreading the 256 colours over two separate scenes, it only has to focus on one.
This doesn't mean you should only make gifs with one cut in them. That would be boring. Rather, it's something to consider when you find yourself with a lot of grain and perhaps 10 different cuts in the same GIF.
Clean, yet lots of cuts
While all these gifs have a lot of cuts, they all share very similar colours. This means they'll appear clean even though lots of different stuff is going on.
Colouring
I've talked about this a little bit before in my tutorial about pastels and basic colour theory. To summarise what I wrote there, you basically want to avoid drastically changing the brightness and exposure of your image. While you can darken something without many consequences, when you brighten something that wasn't originally like that, you're going to reveal blotches and pixelation within the colours. Hence why you want to avoid overediting/colouring. For example:

^ Limited editing

^ High brightness
^ High contrast
This doesn't mean you can't experment with colour. If anything I'd say a general rule of thumb to follow isn't about altering colours, it's to avoid brightening colours too much.
Surface blur
Something really common used by anime gif makers is surface blur. Any type of blurring will remove a small amount of detail. Surface blur attacks flat surfaces in your images while leaving clear lines in tact for the most part. This means that a low amount of surface blur can remove small specs of grain without doing anything bad to the image.

^ Without surface blur (grain clear in skirt)

^ With surface blur
You can find surface blur in Filters > Blur > Surface blur. Don't go over 3 or 4 in either of the input fields. If the radius is high then the threshold has to be lower and visa versa. I generally use the setting 1 to 2 or something like that. The higher you make these numbers, the more texture detail you can lose and the more faded your lines can get. We just want to get rid of some blotches and grain, not of the detail of the animation.
Save settings
Note: This has been taken from the tutorial "save for web explained".
What settings you use are completely dependent on the type of scene you have in front of you. Let's take a gif and save it in different ways.

^ Selective diffusion 100% dither
The problem with diffusion is that it won't make your gradient colours look great majority of the time. Your flat colours however, will look pretty good with little grain. I personally hardly ever save my gifs on regular diffusion. I generally prefer pattern.

^ Selective pattern
Pattern is the safe choice for your gifs. As the name implies, it creates a pattern within your image that will create the illusion of smoother gradients. The downside of pattern however is that you won't be able to get super smooth flat surfaces.
You'll notice that when you're in diffusion and there's a tiny little bit of grain, this will translate to a very clear patterned form of grain in pattern. A good way to tell when pattern will look clean, is to see if diffusion has no grain specs in flat surfaces.

^ Selective diffusion 99% dither
Let's say the character had a few specs of grain when on 100% dither when set to diffusion. By lowering the % dither to 99%, we remove any grain in the flat surfaces of the character. In turn, this made the door look horrible.

^ Selective diffusion 0% dither
By turning the dithering even lower, even the flat surfaces start to look bad. Her face is completely blotchy which is something we absolutely do not want. The door looks even worse as well. There are situations where you can do this of course, but those are generally completely flat coloured scenes.
So let's have a look at gifs on certain settings
Saved on pattern (selective/adaptive)


All these scenes are very colour and gradient heavy. They wouldn't look all that good when saved on diffusion. Pattern is the obvious choice for these.
Saved on diffusion with lowered % dither/no dither:


These scenes have primarily flat colours with little to no gradient shading in them. Because of that, you can lower the amount of dither in them and not have them look horrible.
Sampling colours
Let's go back to the Ponyo gif we coloured earlier. Below you can see it saved on diffusion, 100 dither and with an adaptive palette. At first glance it looks pretty clean.

But when zoomed in, you can see the little speckles of grain showing up quite clearly. We want to remove them.

Like I've mentioned earlier, what you can do is adjust the colouring to the point that it is clean. Which is something I do recommend you do because it's much simpler than the method I'm about to explain. Firstly however, we're just going to lower the dither to 99%. The colouring is flat and we won't run into any big problems if we lower the dither by 1%.

On 99% dither we've taken care of pretty much all of the grain. You can see that there's still a little something though, right on the white belly. Truth be told, most people wouldn't even notice that. But we're going to delve into the way we can fix this.
In save for web, make sure you have 2-up view or 4-up view selected. What we need is for the original image to be shown right next to the one we're saving.

On the left of the original image in save for web, you can find the eyedropper tool.
. 
With the eyedropper tool you can sample colours any of the previews in save for web. Within your about-to-be saved gif, you can now pin point colours in the areas that are grainy and remove them.
Let's go back a little. Select the eyedropper tool and select a grainy area in the version of the gif you are about to save. You will now have that colour selected in your colour table. What you can do now, is press the trash can icon and delete that colour. This means that you now have 255 colours in your gif.

Sometimes this will clear out the grain in that area, but today we're not that lucky. We still have a bit of grain left. The main reason we sampled and removed a colour is to make space for a new colour.

Again, select the eyedropper tool. Now instead of in your about-to-be saved gif, sample a colour in the area that is appearing grainy from the clean original. Once you have done that, select your about-to-be-saved gif and click the new colour icon.
Below you can see the icon I'm talking about. What you just did is sample a colour and add that colour into the palette of the gif you're about to save.

We're almost there.

It's very hard to see, but there is some blotching in the hair.

I used the method I just explained and now the area is clean.

The problem is, because the hair is so similar in colour as the rest of the body, this created a blotched area in another part of the gif.

You can alter the colour a little or you can keep trying until it appears clean. My recommendation is to get it as clean as you can with your colouring before you start using this method. While it's a pretty solid and guaranteed way of getting a clean gif, it can make lines look messy and end up being very time consuming.
That's all!
If you have any questions, feel free to send me a message.
ortonmagnstowiter.blogspot.com
Source: https://anue.tumblr.com/giftut-cleangifs
0 Response to "You Will Never Be Clean Again Gif"
Post a Comment